Floral combs have gained a lot of popularity over the past few years so we thought we’d share this easy DIY! It’s perfect for engagements, weddings, or just for fun!
Who wouldn’t wear flowers in their hair?!

What You’ll Need:
• Fresh Flowers (we used Spray Roses and Brunia)
• Snips
• Ribbon (Choose various thicknesses for depth and interest. We picked ribbon with subtle colors and lots of texture. Make sure you get a thick option to cover up the card stock).
• Card Stock (Select a subtle color here, this is just a structural component)
• Hair Comb (You can purchase these from any general store, they have various sizes)
• Hot Glue Gun (Any glue gun will do, we use this for the construction portion of the backing)
• Cold Floral Glue (We use cold floral glue for fresh flowers, it adheres in a flexible manor and does less!)

Step 1: Cut a 2” x 4” piece of card stock. For various size combs a rule of thumb is to make sure the edge of the card stock extends about a quarter of an inch past the width of the comb. Fold the card stock in half.
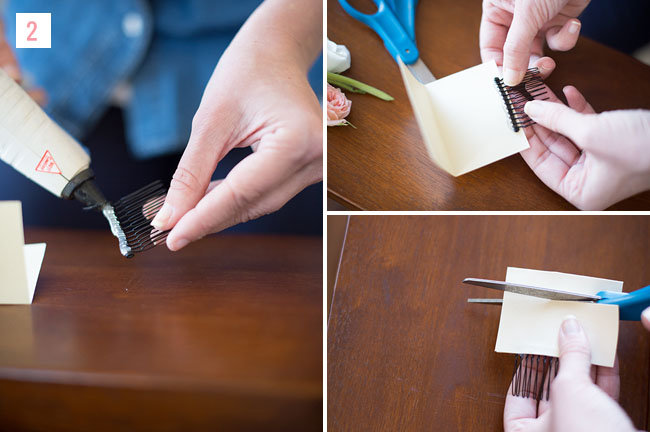
Step 2: Run a generous line of hot glue along the back of the comb and attach it to the non-folded side of the card stock. Press the two open sides of the card stock together to hide the top of the comb. Cut off any excess or extra that you don’t need.
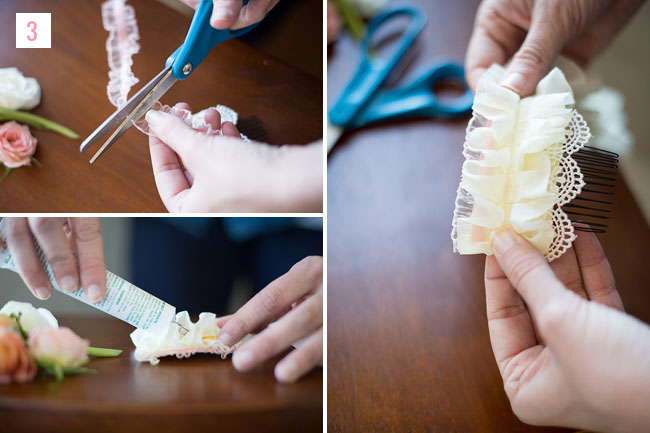
Step 3: Cut your ribbon to the appropriate size to conceal the card stock. Don’t be afraid to layer the ribbon adding depth and interest. Once cut to the appropriate length, glue the ribbon to the backing.
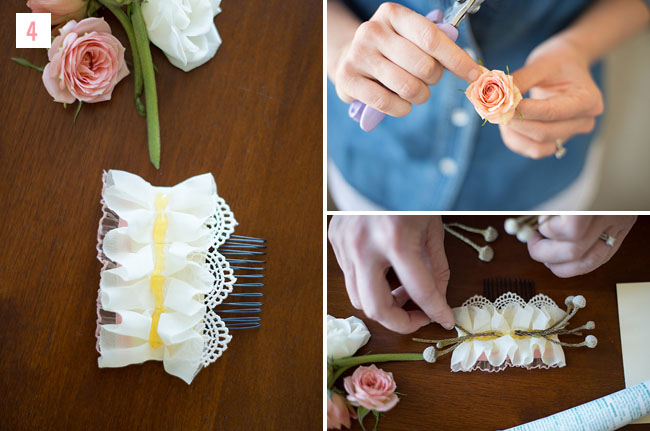
Step 4: Now we move on to the cold glue for fresh flowers (you can use hot if you’re using silk). Run a line of cold glue along the ribbon in the desired place. Let the glue set up for about 10-20 seconds. While you’re waiting for the glue to set up, snip your desired flowers short at the base.
Tip: make sure you clean your flowers by taking off any blemished outer petals.
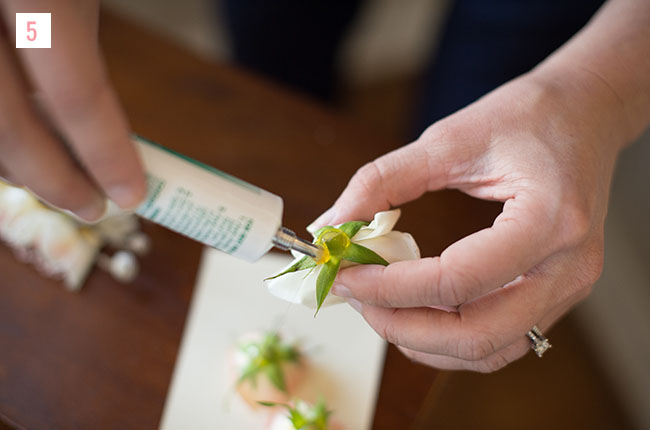
Step 5: Apply a dollop of cold glue to the bottom of the cut flower (do this slowly as the cold glue has a tendency to run at first). Allow the glue to set up for 10-20 seconds.
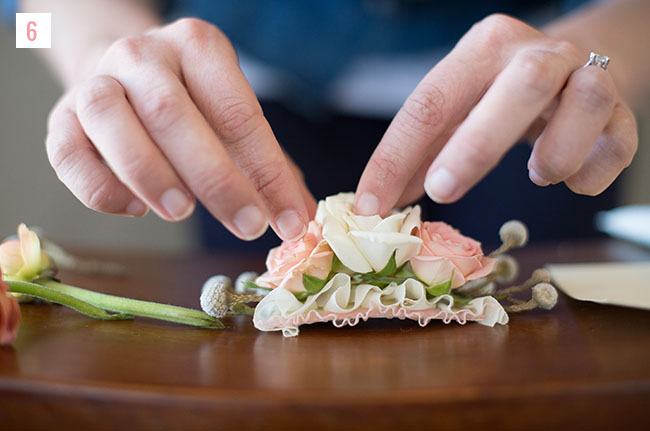
Step 6: Apply the flowers to the comb, making sure that the glue you placed on the backing and the glue on the flower are touching (the glue works like rubber cement and bonds to itself). Arrange the flowers as you see fit. Fill in any holes you may see with buds or other floral elements you’ve gathered. Let sit for a good 30 minutes before use and enjoy!
Follow this easy step by step DIY and tag us in your creations with #bloomcultureflowers to be featured!


Share your story online with the hashtag #bloomcultureflowers to be featured!
Special thank you to Ely Fair Photography and Green Wedding Shoes Blog for originally posting/featuring our DIY on their blog. All photos taken by Ely Fair and photo arrangement borrowed from GWS.
Leave a comment